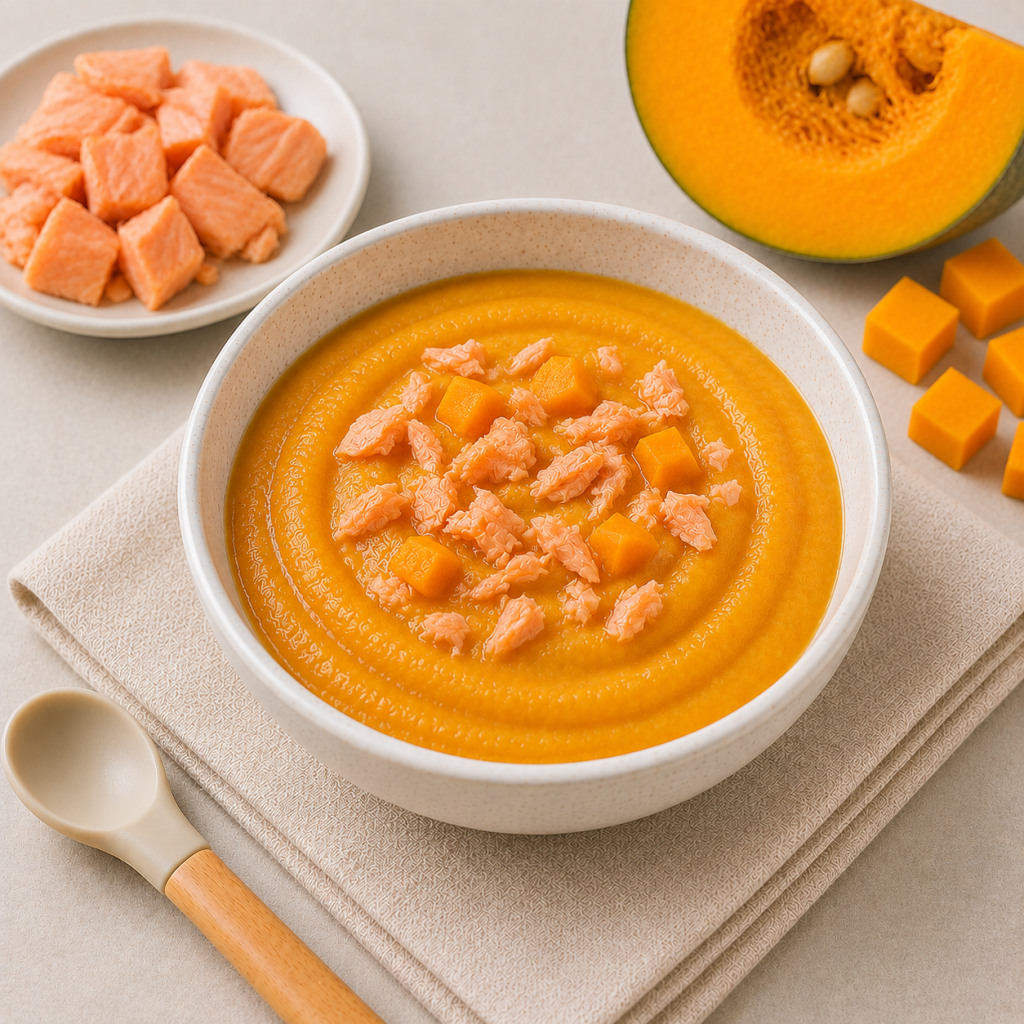
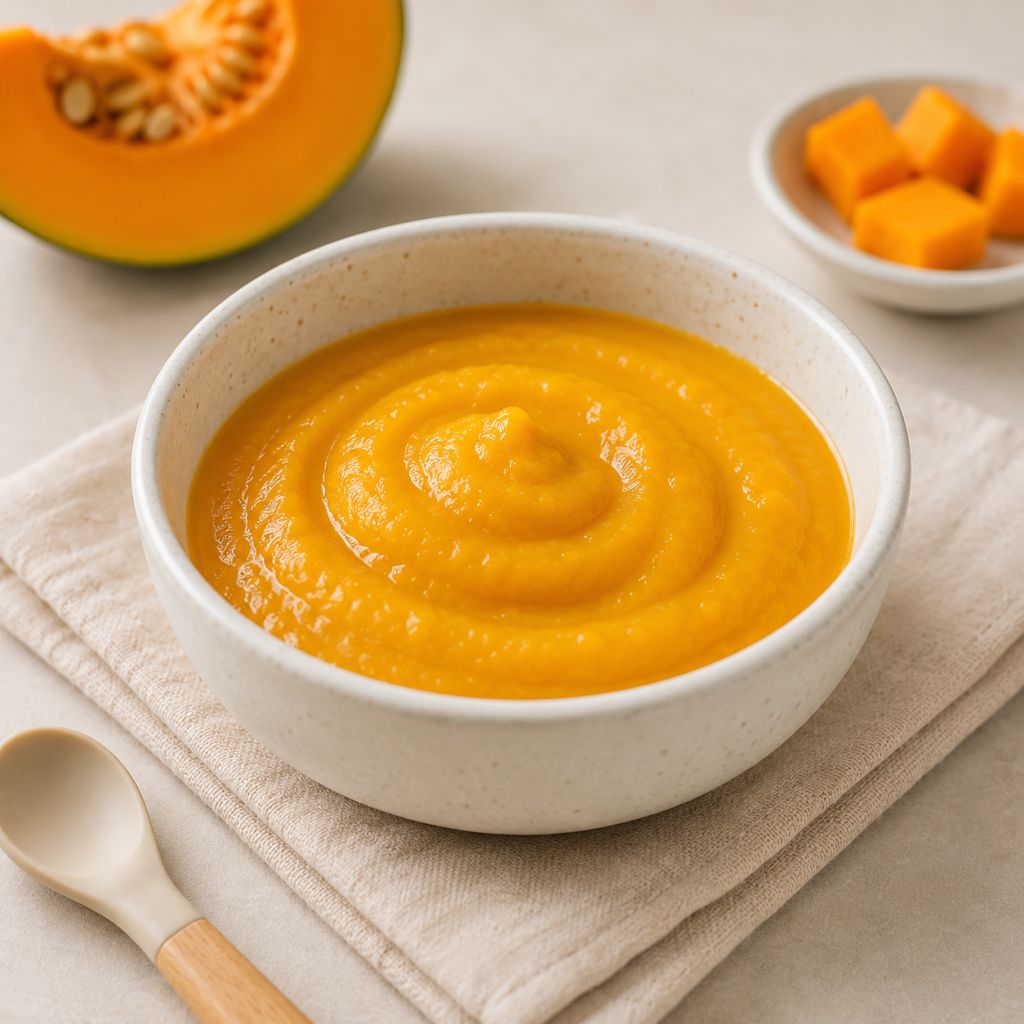
This easy salmon pumpkin puree for baby combines tender salmon with naturally sweet and creamy pumpkin for a simple homemade baby meal. Once steamed until soft, both ingredients can be blended together into a smooth texture that’s easy to adjust as your baby progresses with solids.
When I started introducing fish to my little one, I liked pairing it with vegetables she was already familiar with. Pumpkin worked especially well because its natural sweetness balanced the stronger flavour of salmon without needing any extra seasoning.
When preparing salmon for my little one, the part I pay the most attention to is checking for bones.
I usually check the salmon once when preparing it and again after it’s cooked and flaked. The second check gives me another chance to spot any tiny bones I might have missed.
I also like pairing salmon with pumpkin because the naturally sweet flavour makes fish easier to incorporate into a simple baby meal.
How to Choose Salmon and Pumpkin for Baby Puree
For salmon, choose:
Fresh salmon from a trusted source
Flesh that looks fresh and firm
Salmon with no unusual or unpleasant smell
A boneless cut where possible, while still checking carefully for bones yourself
For pumpkin, choose one that:
Feels firm
Has fresh-looking flesh
Has no soft, mouldy or spoiled areas
Has a naturally bright colour
What Texture Should Salmon Pumpkin Puree Be?
For babies just starting solids: Blend thoroughly with enough warm water to create a smooth consistency.
As baby progresses: Use less water and gradually make the puree thicker.
When your baby is comfortable with more texture, you can also blend the pumpkin while leaving the salmon slightly less smooth, as appropriate for your baby’s feeding abilities.
How to Store Salmon Pumpkin Puree
Because this recipe contains cooked fish, cool any portion you’re keeping promptly and transfer it into a clean, airtight container in the refrigerator.
I personally prefer preparing fish-based baby meals in smaller portions so I only make what I actually need. If I prepare extra, I portion it before storing so it’s easier to take out one serving at a time.
What Can I Mix With Salmon Pumpkin Puree?
Once the individual ingredients have been introduced, some easy combinations include:
Salmon + Pumpkin + Potato
Salmon + Pumpkin + Sweet Potato
Salmon + Pumpkin + Carrot
Salmon + Pumpkin + Broccoli
Salmon + Pumpkin + Rice
SHOP SY PICKS
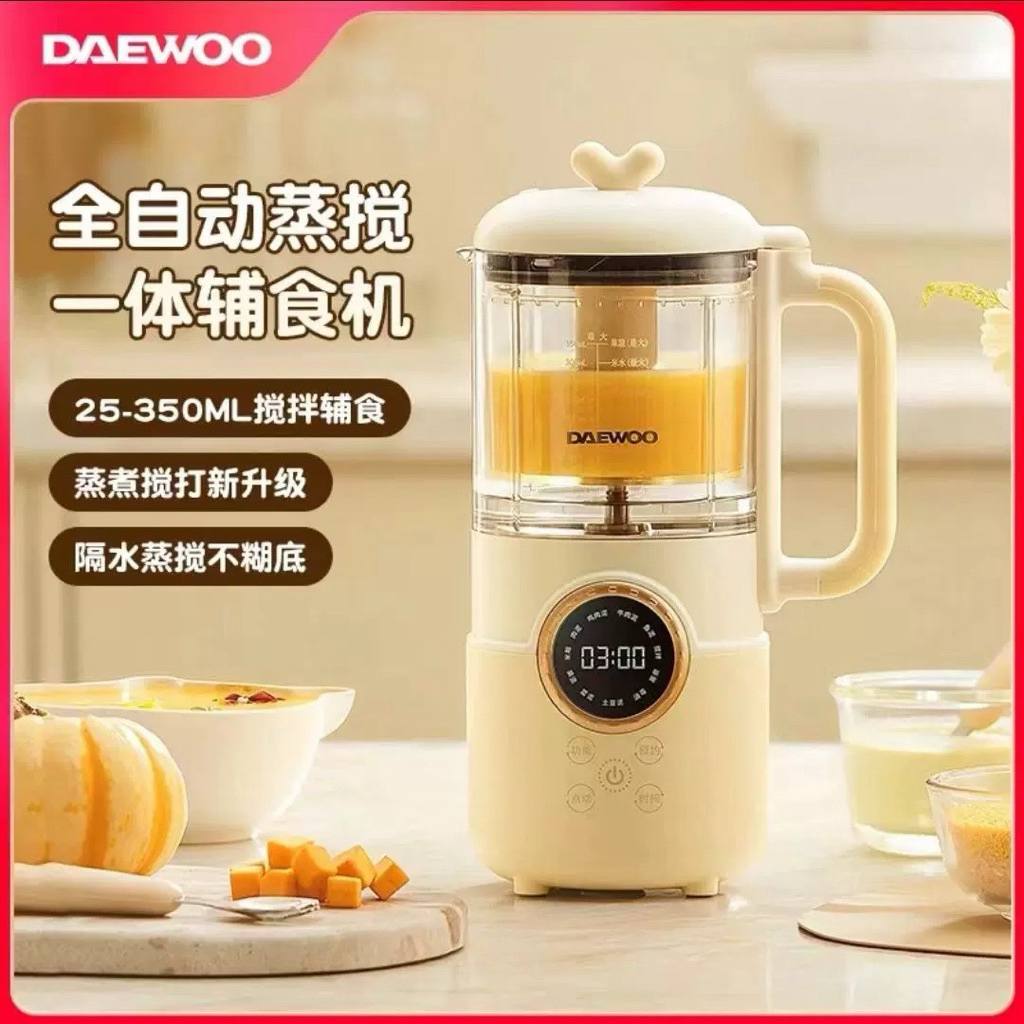
These are the simple tools I use at home to make baby food prep quicker and easier. Nothing fancy, just a few practical essentials that make cooking, portioning and storing meals much more convenient.
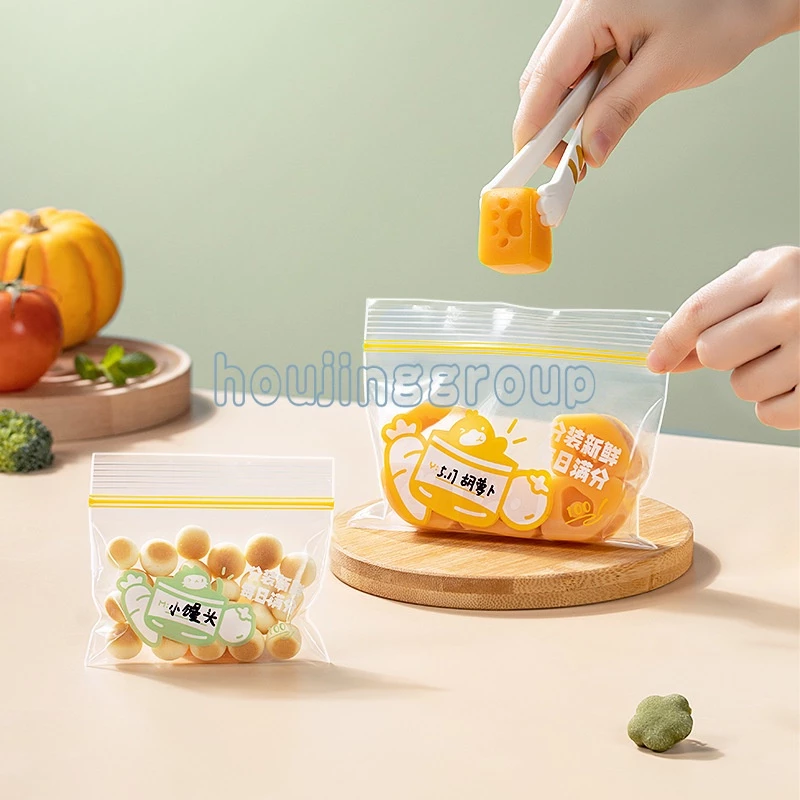
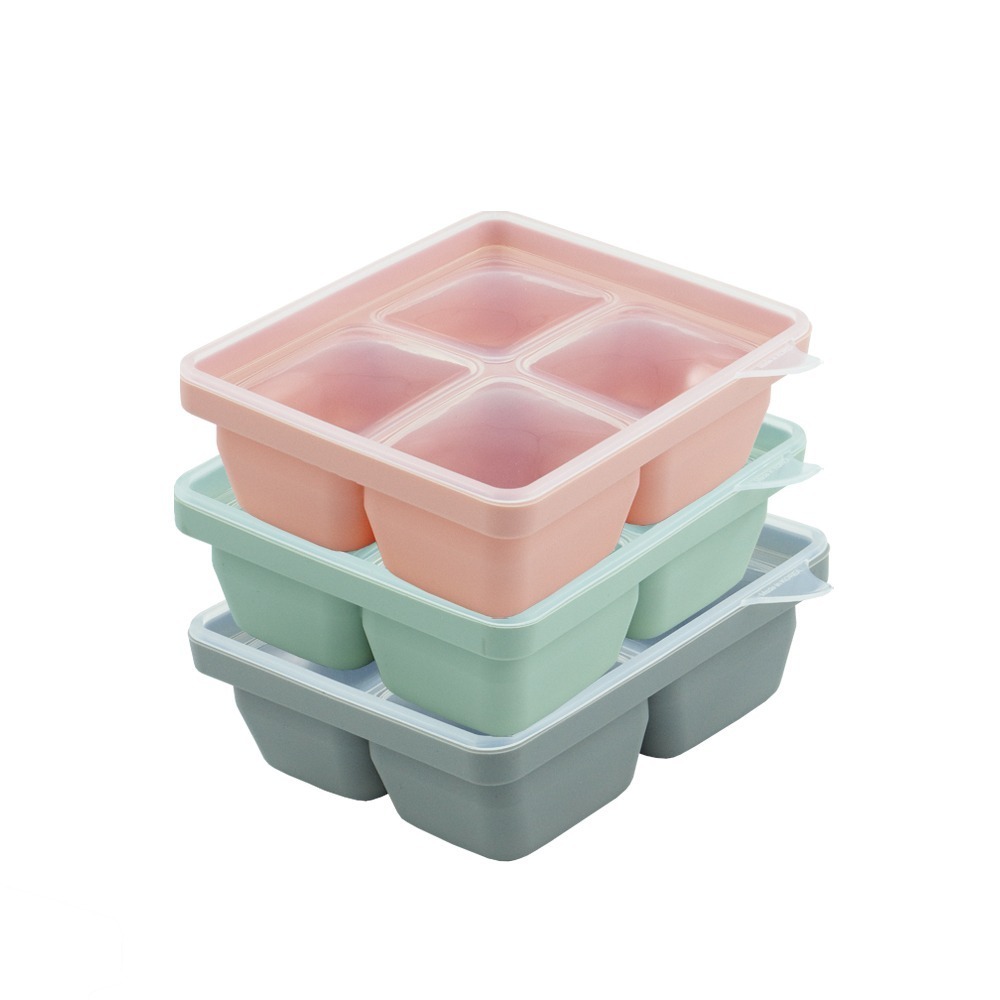
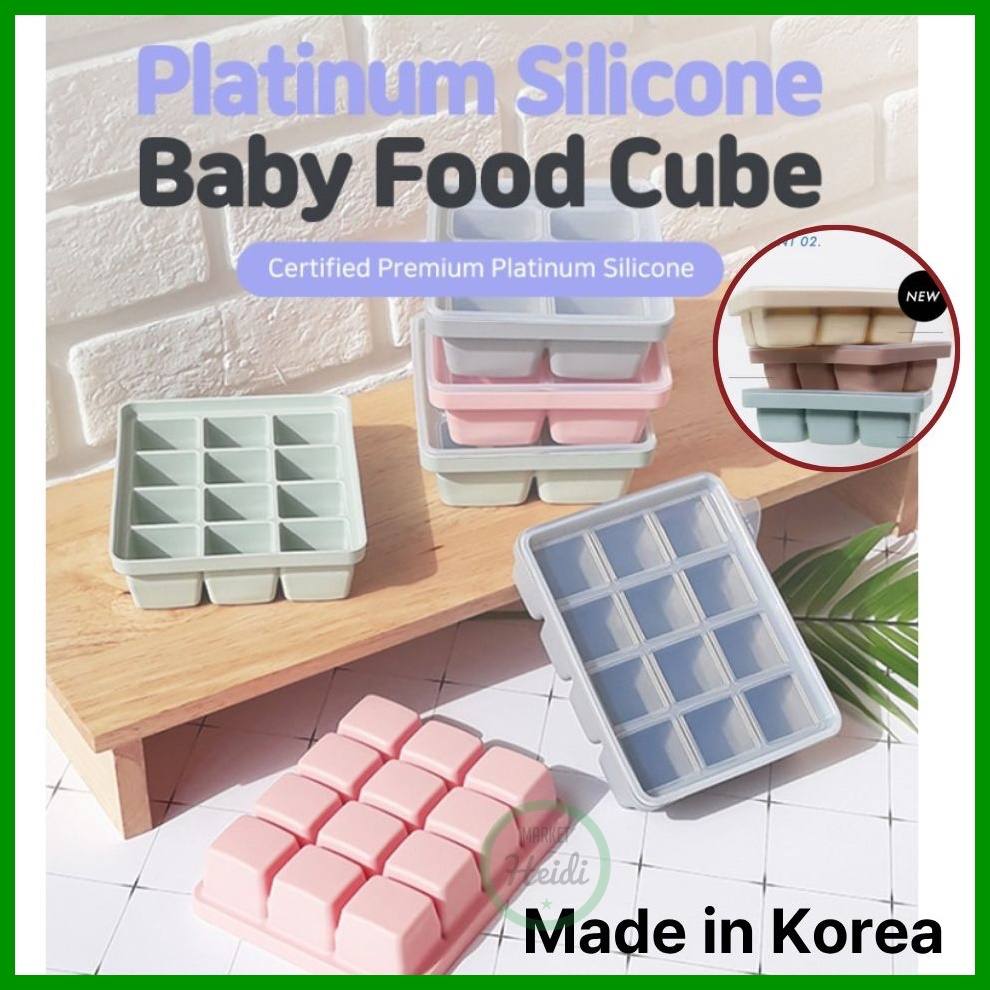
Perfect for freezing baby food portions. Makes storing homemade purees simple, organised and convenient for everyday meals.
Frequently Asked Questions
Salmon and pumpkin can be offered once your baby is developmentally ready for solids. Fish is also a common allergen, so introduce it in an age-appropriate form and follow the feeding guidance you use for introducing new allergens.
For this smooth puree recipe, I prefer removing the salmon skin before cooking and blending.
Check the salmon carefully before cooking. After steaming, flake the fish apart and check it again before placing it into the blender. I prefer doing both checks when preparing salmon for my little one.
No. There’s no need to add salt or seasoning. Pumpkin already adds some natural sweetness and flavour to the puree.
Yes. Steam the pumpkin until very soft and mash it thoroughly. Cook and finely flake the salmon, checking carefully for bones, then combine it with the mashed pumpkin in a texture appropriate for your baby’s feeding stage.
Pumpkin naturally creates a thick and creamy consistency. Add warm water a little at a time while blending until you reach the texture you want.
Salmon can be paired with ingredients such as potato, sweet potato, carrot or broccoli, once those ingredients have been introduced individually.
This article shares my personal experience and general information and should not replace individual medical or feeding advice. Babies develop at different rates. Speak with your child’s healthcare professional before starting solids if you have concerns about developmental readiness, growth, allergies or feeding.
About the author
SY is a mum of one and the founder of PicksBySY. Like many mums, she’s constantly learning, discovering and figuring things out as her little one grows. She created PicksBySY to share her real parenting experiences, useful finds and everyday discoveries – from baby milestones and toddler life to family activities and products she genuinely uses and loves.
More Recipes
Explore more easy baby food recipes for your little one.
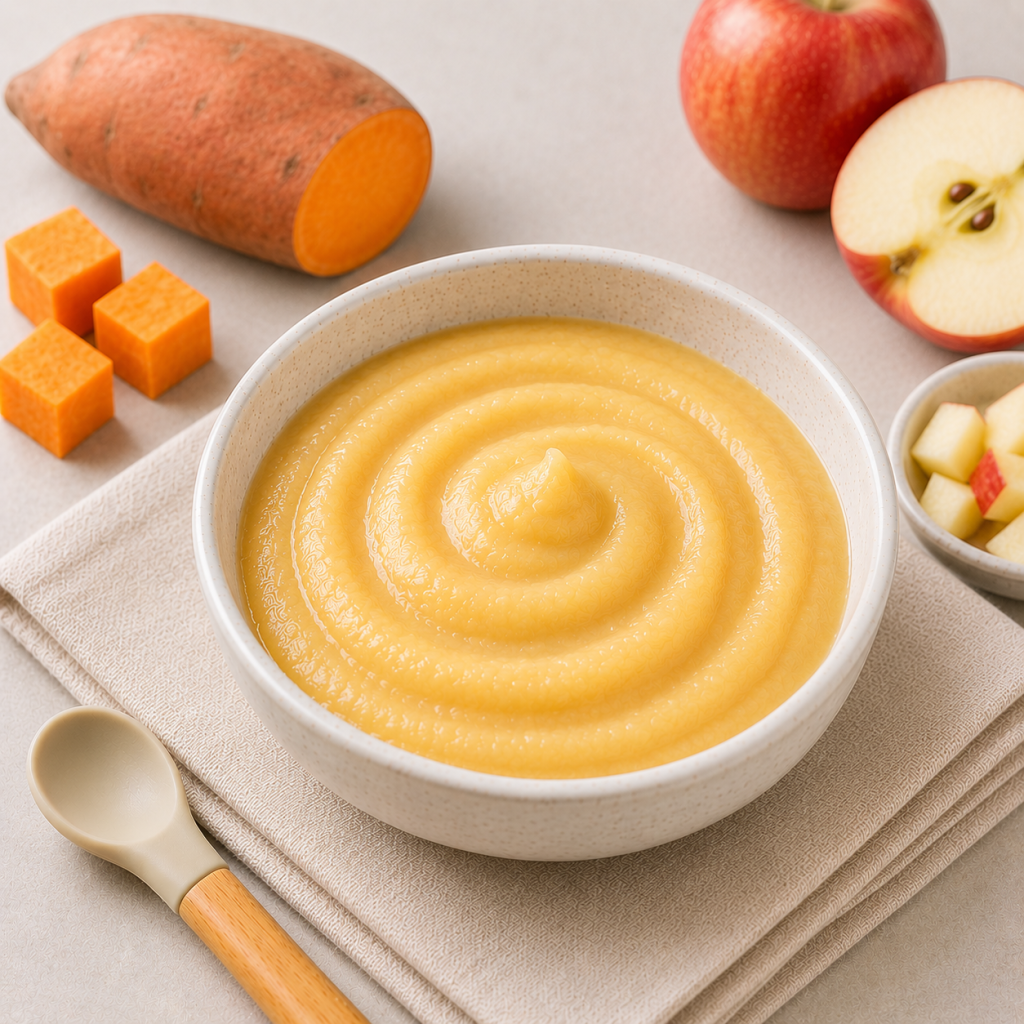
This easy sweet potato apple puree for baby is a naturally sweet and creamy baby food that requires only a few simple ingredients. Once steamed until soft, sweet potato and apple blend together into a smooth texture that’s easy to adjust as your baby progresses with solids.
Sweet potato and apple were two ingredients I often had at home, which made this combination really convenient when my little one started solids. I could simply peel, steam and blend them with a little warm water — an easy option when I wanted to add some variety without making the meal too complicated.
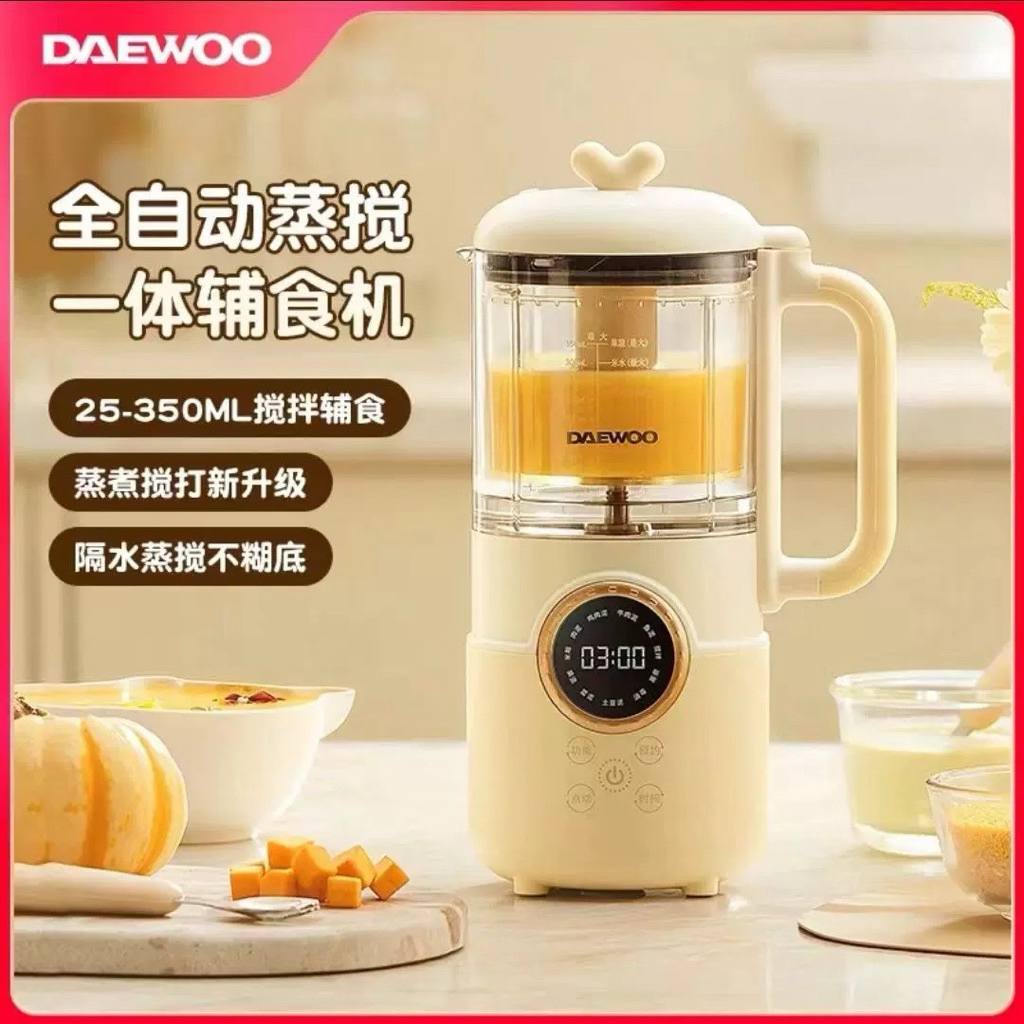
On busy days, I like anything that can reduce the number of steps and things I need to wash. A Daewoo Baby Food Maker can be especially convenient because it combines steaming and blending in one machine.
For this sweet potato apple puree, simply prepare and cut the ingredients into smaller pieces, place them into the food maker to steam until soft, then blend them directly in the same machine until you reach your baby’s preferred consistency.
Why I Like a 2-in-1 Baby Food Maker
Steam and blend in one machine – no need to use a separate steamer and blender.
Less washing up – especially helpful when preparing baby food regularly.
Easy for small portions – convenient when you only need one or two baby servings.
Adjustable texture – blend smoother for early solids or gradually leave more texture as your baby progresses.
Useful for meal prep – works for vegetables, fruits and other baby food combinations.
Mum Tip
I like this combination because both ingredients are naturally sweet, so there’s really no need to add anything else.
Sweet potato can make the puree quite thick, so I usually add the water little by little while blending until I get the texture I want.
How to Choose Sweet Potato and Apple for Baby Puree
For sweet potato, choose one that:
Feels firm
Has relatively smooth, fresh-looking skin
Has no soft or spoiled areas
For apple, choose one that:
Feels firm and fresh
Has no bruised or spoiled areas
Is ripe and naturally sweet
What Texture Should Sweet Potato Apple Puree Be?
For babies just starting solids: Blend thoroughly with enough warm water to create a smooth consistency.
As baby progresses: Use less water and gradually make the puree thicker.
How to Store Sweet Potato Apple Puree
Cool any portion you’re keeping promptly and transfer it into a clean, airtight container in the refrigerator.
I personally prefer preparing baby puree in smaller portions. If I make extra, I portion it before storing so I can easily take out only what I need for each meal.
What Can I Mix With Sweet Potato Apple Puree?
Some easy combinations include:
Sweet Potato + Apple + Carrot
Sweet Potato + Apple + Pumpkin
Sweet Potato + Apple + Banana
Sweet Potato + Apple + Oats
Sweet Potato + Apple + Avocado
SHOP SY PICKS
These are the simple tools I use at home to make baby food prep quicker and easier. Nothing fancy, just a few practical essentials that make cooking, portioning and storing meals much more convenient.
Perfect for freezing baby food portions. Makes storing homemade purees simple, organised and convenient for everyday meals.
Frequently Asked Questions
Sweet potato and apple can be introduced when your baby is developmentally ready to start solids, which is commonly around 6 months. Make sure the puree is prepared in a smooth, age-appropriate texture.
For this recipe, I prefer steaming the apple together with the sweet potato. It softens the apple and makes both ingredients easy to blend into a smooth puree.
No. Sweet potato and apple are naturally sweet, so there’s no need to add sugar, honey or other sweeteners.
Yes. If both ingredients are steamed until very soft, you can mash them thoroughly with a fork. Add a little warm water if needed to adjust the consistency.
Yes, you can portion the puree into clean, freezer-safe baby food containers or silicone trays. I find portioning it before freezing especially convenient because I can take out only what I need for each meal.
Sweet potato naturally creates a thick, creamy puree. Simply add warm water a little at a time while blending until you reach your baby’s preferred consistency.
Once your baby has tried the individual ingredients, you can experiment with combinations such as carrot, pumpkin, banana, avocado or oats to create different flavours and textures.
This article shares my personal experience and general information and should not replace individual medical or feeding advice. Babies develop at different rates. Speak with your child’s healthcare professional before starting solids if you have concerns about developmental readiness, growth, allergies or feeding.
About the author
SY is a mum of one and the founder of PicksBySY. Like many mums, she’s constantly learning, discovering and figuring things out as her little one grows. She created PicksBySY to share her real parenting experiences, useful finds and everyday discoveries – from baby milestones and toddler life to family activities and products she genuinely uses and loves.
More Recipes
Explore more easy baby food recipes for your little one.
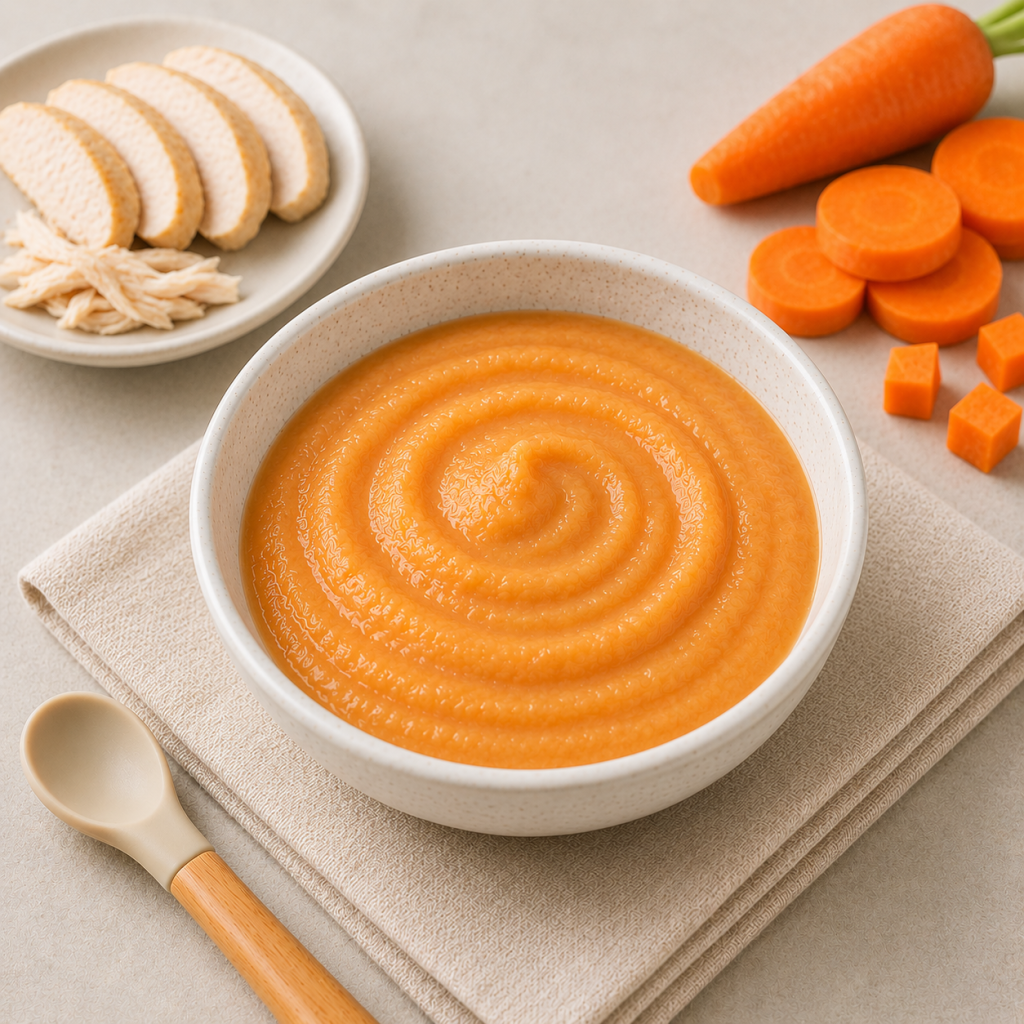
This easy chicken carrot puree for baby combines tender chicken with naturally sweet carrot to create a smooth and simple homemade baby meal. It’s an easy savoury combination for introducing different flavours and ingredients as your baby progresses with solids.
When I started adding meat into my little one’s meals, I liked pairing it with vegetables she was already familiar with. Carrot was an easy choice because its natural sweetness worked really well with chicken, and both ingredients could be steamed together to keep preparation simple.
Chicken and carrot make a simple savoury combination, with carrot adding a little natural sweetness to the meal.
How to Make Chicken Carrot Puree for Baby
1. Prepare the Ingredients
Peel and wash the carrot before cutting it into small pieces.
Cut the chicken into small pieces and make sure there are no bones.
2. Steam Until Fully Cooked
Steam the chicken and carrot for around 15–20 minutes, or until the carrot is completely soft and the chicken is thoroughly cooked through.
3. Blend Until Smooth
Transfer the cooked chicken and carrot into a baby food blender.
Add warm water gradually and blend until you reach your baby’s preferred consistency.
4. Serve Warm
Transfer the chicken carrot puree for baby into a clean baby bowl and allow it to cool before serving.
There’s no need to add salt or other seasoning.
Mum Tip
When I started introducing meat, I found it easier to pair it with vegetables my little one had already tried.
Carrot worked especially well because it added a little natural sweetness to the chicken without needing any extra seasoning.
How to Choose Chicken and Carrot for Baby Puree
For chicken, choose:
Fresh boneless chicken
Chicken that has been properly refrigerated
Meat with no unusual smell or appearance
For carrot, choose one that:
Feels firm
Looks fresh
Has no soft or spoiled areas
What Texture Should Chicken Carrot Puree Be?
For babies just starting solids: Blend thoroughly with enough warm water to create a smooth consistency.
As baby progresses: Use less water and gradually make the puree thicker.
How to Store Chicken Carrot Puree
Because this recipe contains cooked chicken, cool any portion you’re keeping promptly and transfer it into a clean, airtight container in the refrigerator.
I personally prefer making meat-based baby meals in smaller portions so I only prepare what I actually need.
What Can I Mix With Chicken Carrot Puree?
Some easy combinations include:
Chicken + Carrot + Potato
Chicken + Carrot + Pumpkin
Chicken + Carrot + Broccoli
Chicken + Carrot + Rice
Chicken + Carrot + Sweet Potato
SHOP SY PICKS
These are the simple tools I use at home to make baby food prep quicker and easier. Nothing fancy, just a few practical essentials that make cooking, portioning and storing meals much more convenient.
Perfect for freezing baby food portions. Makes storing homemade purees simple, organised and convenient for everyday meals.
Frequently Asked Questions
Chicken and carrot can be prepared together in an age-appropriate texture once your baby is ready for solids. Make sure the chicken is thoroughly cooked and the carrot is completely soft.
Boneless, skinless chicken breast or thigh can both be used.
Chicken can be more difficult to blend than vegetables. Combining it with soft carrot and gradually adding warm water helps create a smoother consistency.
No. There’s no need to add salt to chicken carrot puree for baby.
Yes. As your baby progresses with textures, cooked chicken and carrot can also be combined with soft rice or porridge.
Potato, pumpkin, broccoli, sweet potato and rice are easy ingredients to explore alongside chicken and carrot.
This article shares my personal experience and general information and should not replace individual medical or feeding advice. Babies develop at different rates. Speak with your child’s healthcare professional before starting solids if you have concerns about developmental readiness, growth, allergies or feeding.
About the author
SY is a mum of one and the founder of PicksBySY. Like many mums, she’s constantly learning, discovering and figuring things out as her little one grows. She created PicksBySY to share her real parenting experiences, useful finds and everyday discoveries – from baby milestones and toddler life to family activities and products she genuinely uses and loves.
More Recipes
Explore more easy baby food recipes for your little one.
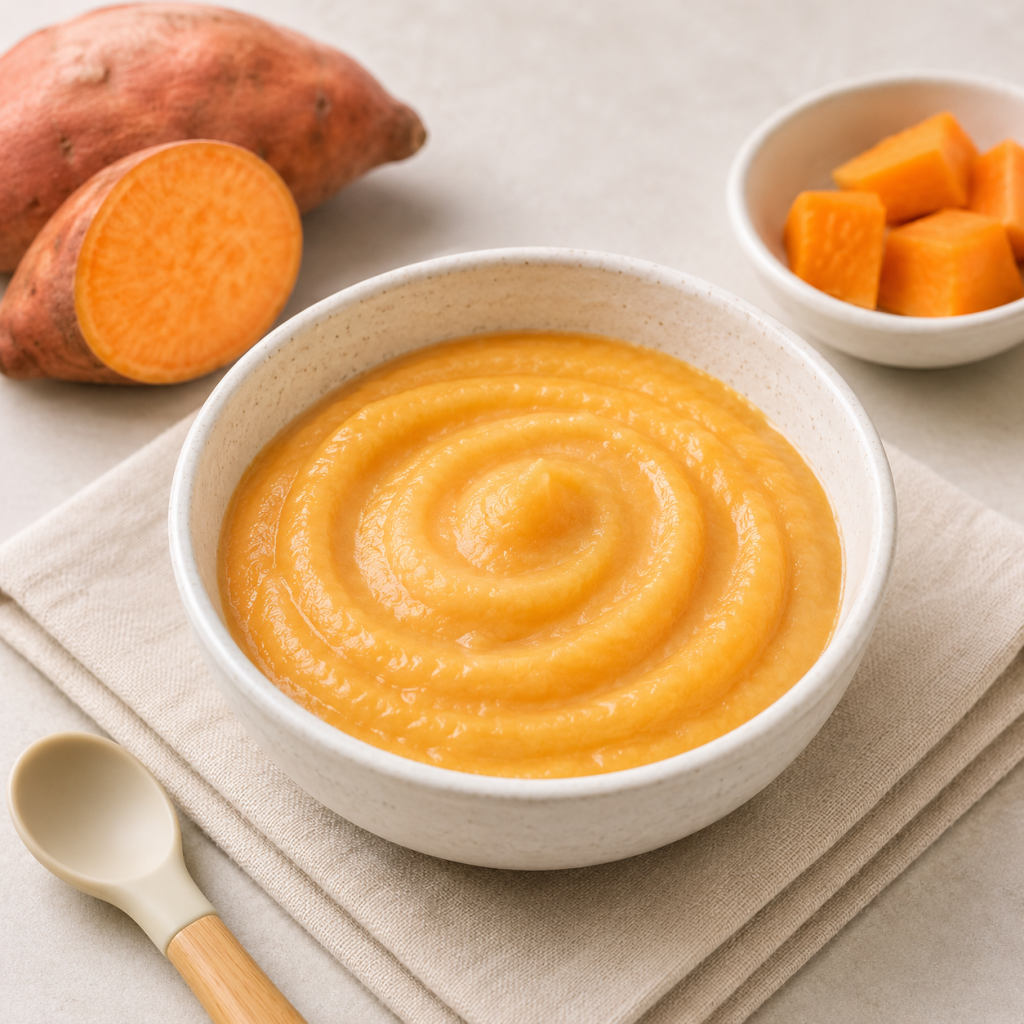
This easy sweet potato puree for baby is naturally sweet, soft and creamy, making it a simple first food to prepare when starting solids. With just sweet potato and a little warm water, you can make a smooth homemade baby puree without complicated preparation.
Sweet potato quickly became one of my favourite ingredients when my little one started solids. Once steamed, it was already so soft and creamy that blending took hardly any effort. I also loved that its natural sweetness meant there was no need to add sugar or other sweeteners.
Sweet potato was one of my favourite ingredients for meal prep because it becomes naturally creamy after steaming.
I usually start with very little water when blending because it’s always easier to add more if the puree is too thick.
How to Choose a Sweet Potato for Baby Puree
Look for a sweet potato that:
Feels firm
Has relatively smooth skin
Has no soft or wet spots
Has no signs of mould
Has no major cuts or damaged areas
What Texture Should Sweet Potato Puree Be?
For babies just starting solids: Blend thoroughly with a little warm water until smooth and easy to spoon.
As baby progresses: Use less water and gradually leave the sweet potato thicker or lightly mashed.
How to Store Sweet Potato Puree
Allow the puree to cool before transferring it into a clean, airtight food container and refrigerating it promptly.
If you’re preparing several portions, divide them into individual containers so you can take out only what you need for each meal.
What Can I Mix With Sweet Potato Puree?
Some easy combinations include:
Sweet Potato + Apple
Sweet Potato + Carrot
Sweet Potato + Pumpkin
Sweet Potato + Chicken
Sweet Potato + Avocado
Sweet Potato + Salmon
SHOP SY PICKS
These are the simple tools I use at home to make baby food prep quicker and easier. Nothing fancy, just a few practical essentials that make cooking, portioning and storing meals much more convenient.
Perfect for freezing baby food portions. Makes storing homemade purees simple, organised and convenient for everyday meals.
Frequently Asked Questions
Sweet potato can be prepared as a soft puree for babies who are developmentally ready to start solids, usually around 6 months.
Both methods can work, but I personally prefer steaming. The sweet potato becomes beautifully soft without getting too watery.
No. Sweet potato already has a naturally sweet flavour, so there’s no need to add sugar or other sweeteners.
Add warm water one tablespoon at a time while blending until you reach your baby’s preferred consistency.
Yes. You can prepare a small batch ahead of time, cool it promptly and store it appropriately in a clean, airtight container.
This article shares my personal experience and general information and should not replace individual medical or feeding advice. Babies develop at different rates. Speak with your child’s healthcare professional before starting solids if you have concerns about developmental readiness, growth, allergies or feeding.
About the author
SY is a mum of one and the founder of PicksBySY. Like many mums, she’s constantly learning, discovering and figuring things out as her little one grows. She created PicksBySY to share her real parenting experiences, useful finds and everyday discoveries – from baby milestones and toddler life to family activities and products she genuinely uses and loves.
More Recipes
Explore more easy baby food recipes for your little one.
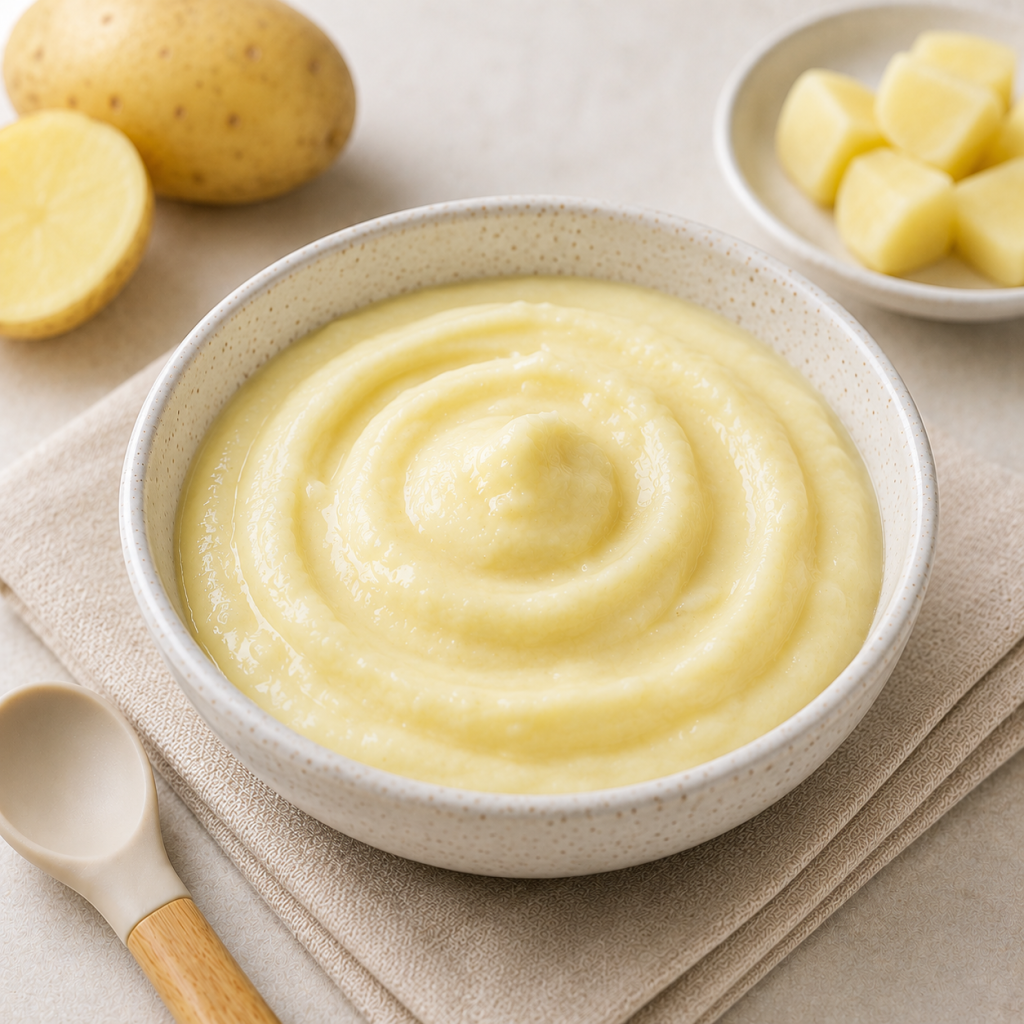
This easy potato puree for baby is a simple and creamy first food that requires only a few basic ingredients. Once cooked until soft, potato can be blended into a smooth texture that’s easy to adjust as your baby progresses with solids.
Potato was one of those ingredients I almost always had at home, which made it really convenient when my little one started solids. I could simply peel, steam and blend it with a little warm water — an easy option when I wanted to prepare something without too much fuss.
Choose a fresh potato that feels firm and has no green patches or sprouts. Potato becomes naturally soft and creamy when cooked, making it easy to prepare as a simple potato puree for baby.
How to Make Potato Puree for Baby
1. Prepare the Potato
Peel the potato and wash it thoroughly. Cut it into small, evenly sized cubes so that it cooks more quickly and evenly.
2. Cook Until Soft
Steam or boil the potato for around 10–15 minutes, or until it is completely soft and can be easily pierced with a fork.
3. Blend Until Smooth
Transfer the cooked potato into a baby food blender or processor.
Add warm water one tablespoon at a time and blend until smooth.
For babies who are just starting solids, make the potato puree smoother and thinner. As your baby progresses with textures, gradually use less water for a thicker consistency.
4. Serve Warm
Transfer the potato puree for baby into a clean baby bowl. Allow it to cool to a safe temperature before serving.
Potato was one of those ingredients I always had at home, so it was an easy option whenever I needed to prepare something simple for my baby.
One thing I noticed is that potato can become quite thick after blending. I normally add the water little by little rather than all at once so I can control the consistency better.
How to Choose a Potato for Baby Puree
Choose a fresh potato that:
Feels firm
Has smooth, healthy-looking skin
Has no green patches
Has no sprouts
Has no soft or rotten areas
What Texture Should Potato Puree Be?
You can adjust the consistency depending on your baby’s stage.
For babies just starting solids: Blend until smooth, adding warm water gradually to create a thinner consistency.
As baby progresses: Use less water and mash the potato instead of blending completely smooth to introduce more texture.
How to Store Potato Puree
Potato puree can be prepared ahead and stored in a clean, airtight food container in the refrigerator.
I personally prefer making smaller portions whenever possible because freshly prepared potato tends to have a nicer texture.
What Can I Mix With Potato Puree?
Once your baby has already tried the individual ingredients, potato can be combined with other baby-friendly foods.
Some easy combinations to try include:
Potato + Carrot
Potato + Pumpkin
Potato + Broccoli
Potato + Chicken
Potato + Salmon
Potato + Spinach
SHOP SY PICKS
These are the simple tools I use at home to make baby food prep quicker and easier. Nothing fancy, just a few practical essentials that make cooking, portioning and storing meals much more convenient.
Perfect for freezing baby food portions. Makes storing homemade purees simple, organised and convenient for everyday meals.
Frequently Asked Questions
Potato can be prepared in a soft, age-appropriate texture for babies who are developmentally ready to start solids, usually around 6 months. Make sure the potato is thoroughly cooked until soft before blending or mashing.
I prefer peeling the potato when making potato puree for baby, especially during the early stages of solids. This also helps create a smoother consistency.
You can use a little breast milk or your baby’s usual prepared formula to adjust the consistency if appropriate. Warm water also works perfectly well.
Potato contains starch and can become sticky or gummy when over-blended. Try blending only until smooth or mash the cooked potato with a fork instead.
Potato puree can be portioned into suitable freezer-safe baby food containers, although its texture may change after freezing and reheating. I personally prefer making smaller fresh batches.
Potato pairs well with carrot, pumpkin, broccoli, spinach, chicken and salmon.
About the author
SY is a mum of one and the founder of PicksBySY. Like many mums, she’s constantly learning, discovering and figuring things out as her little one grows. She created PicksBySY to share her real parenting experiences, useful finds and everyday discoveries – from baby milestones and toddler life to family activities and products she genuinely uses and loves.
More Recipes
Explore more easy baby food recipes for your little one.
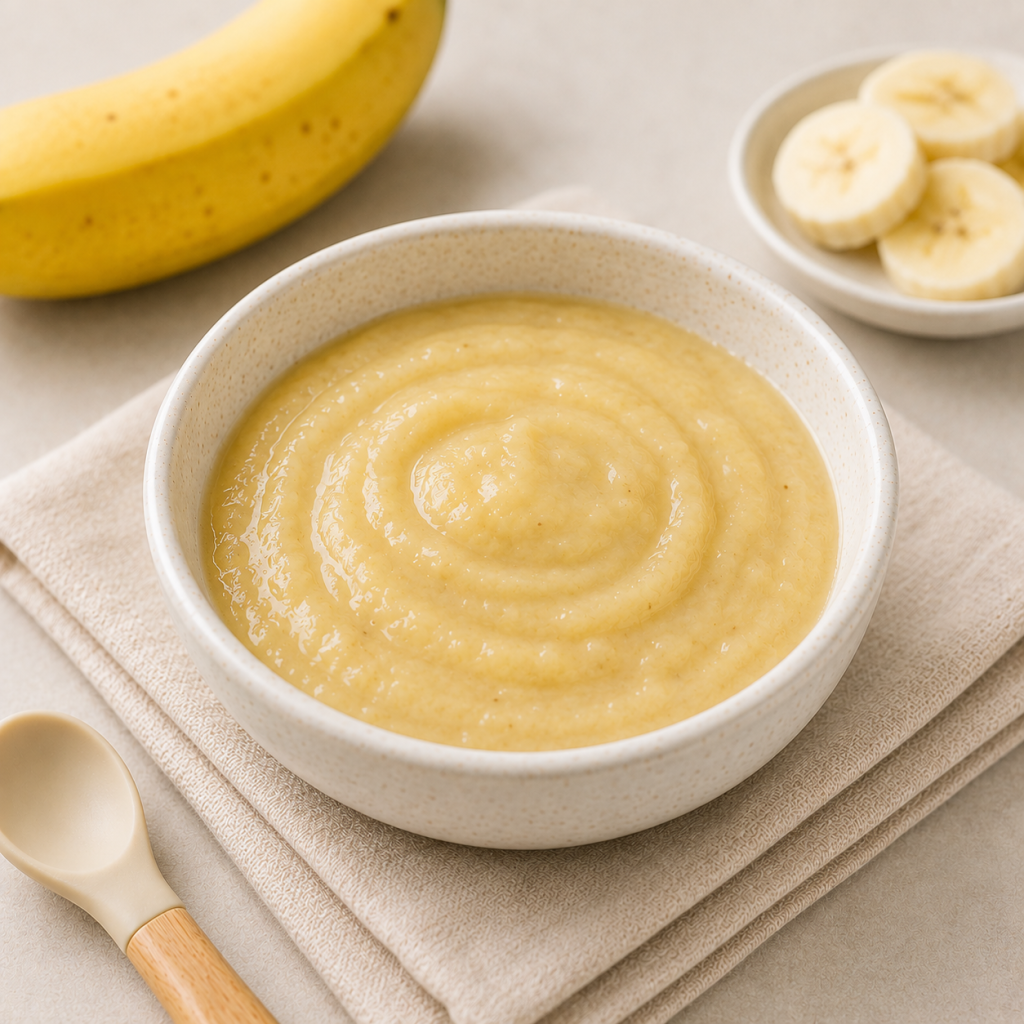
This easy banana puree for baby is one of the quickest first foods you can prepare. Naturally sweet, soft and creamy, it requires no cooking and can be ready in just a few minutes.
Banana was one of those foods I loved having at home when my little one started solids. There was nothing to steam or cook — just peel, mash and serve. It was especially convenient when I needed to prepare something quickly.
Choose a ripe banana that is soft and easy to mash. The riper the banana, the easier it is to create a naturally smooth and creamy baby banana puree.
How to Make Banana Puree for Baby
1. Prepare the Banana
Peel the banana and cut it into a few smaller pieces.
2. Mash Until Smooth
Place the banana in a clean bowl and mash thoroughly with a fork or baby food masher.
For babies who are just starting solids, you can also blend the banana to achieve a smoother consistency.
3. Adjust the Texture
Add warm water one tablespoon at a time and mix until you reach your baby’s preferred consistency.
For babies beginning solids, you can make the banana puree smoother and thinner. As your baby progresses with textures, gradually reduce the amount of water and leave the banana slightly thicker.
4. Serve Fresh
Transfer the banana puree for baby into a clean baby bowl and serve immediately.
Banana is naturally sweet, so there’s no need to add sugar or other sweeteners.
Banana was another one of my go-to baby foods on busy days. No cooking, hardly any preparation and very little washing up!
I normally prepare only what I need for one meal. It takes just a couple of minutes to mash, so making it fresh each time was much easier for me.
How to Choose a Banana for Baby Puree
A ripe banana will give you the best texture and make preparation much easier.
Look for a banana that:
Is yellow and ripe
Feels soft but not overly mushy
Mashes easily with a fork
Has no signs of spoilage
A few brown spots on the peel usually indicate that the banana is becoming riper and sweeter.
What Texture Should Banana Puree Be?
You can adjust the consistency depending on your baby’s stage.
For babies just starting solids: Mash thoroughly or blend until smooth, adding a little warm water if needed.
As baby progresses: Use less water and leave the banana thicker or slightly mashed to introduce more texture.
How to Store Banana Puree
Banana puree is best prepared and served fresh because banana naturally starts to brown after it is peeled and exposed to air.
Since it only takes a few minutes to prepare, I personally prefer making a fresh portion for each meal rather than preparing a large batch.
What Can I Mix With Banana Puree?
Once your baby has already tried the individual ingredients, banana can be combined with other baby-friendly foods.
Some easy combinations to try include:
Banana + Avocado
Banana + Apple
Banana + Pear
Banana + Oatmeal
Banana + Yogurt
Banana + Sweet Potato
SHOP SY PICKS
These are the simple tools I use at home to make baby food prep quicker and easier. Nothing fancy, just a few practical essentials that make cooking, portioning and storing meals much more convenient.
Perfect for freezing baby food portions. Makes storing homemade purees simple, organised and convenient for everyday meals.
Frequently Asked Questions
Banana can generally be offered when babies are developmentally ready to start complementary foods, typically at around 6 months.
No. A ripe banana is naturally soft and doesn’t need to be cooked. Simply peel and mash or blend it to an appropriate consistency.
Banana can be suitable from around 6 months when your baby is developmentally ready for solid foods. Adjust the texture according to your baby’s feeding abilities.
Not necessarily. Ripe banana is naturally soft and creamy. Add a little warm water only if you want to create a thinner consistency.
Banana naturally oxidises after being exposed to air, which causes it to gradually turn brown. This is one reason I prefer preparing banana puree immediately before serving.
Banana can be frozen, although the colour and texture may change after thawing. Since banana puree is so quick to prepare, making it fresh is often more convenient.
Yes. Once your baby has been introduced to both ingredients individually, banana and avocado can be mashed together to create a naturally creamy combination.
This article shares my personal experience and general information and should not replace individual medical or feeding advice. Babies develop at different rates. Speak with your child’s healthcare professional before starting solids if you have concerns about developmental readiness, growth, allergies or feeding.
About the author
SY is a mum of one and the founder of PicksBySY. Like many mums, she’s constantly learning, discovering and figuring things out as her little one grows. She created PicksBySY to share her real parenting experiences, useful finds and everyday discoveries – from baby milestones and toddler life to family activities and products she genuinely uses and loves.
More Recipes
Explore more easy baby food recipes for your little one.
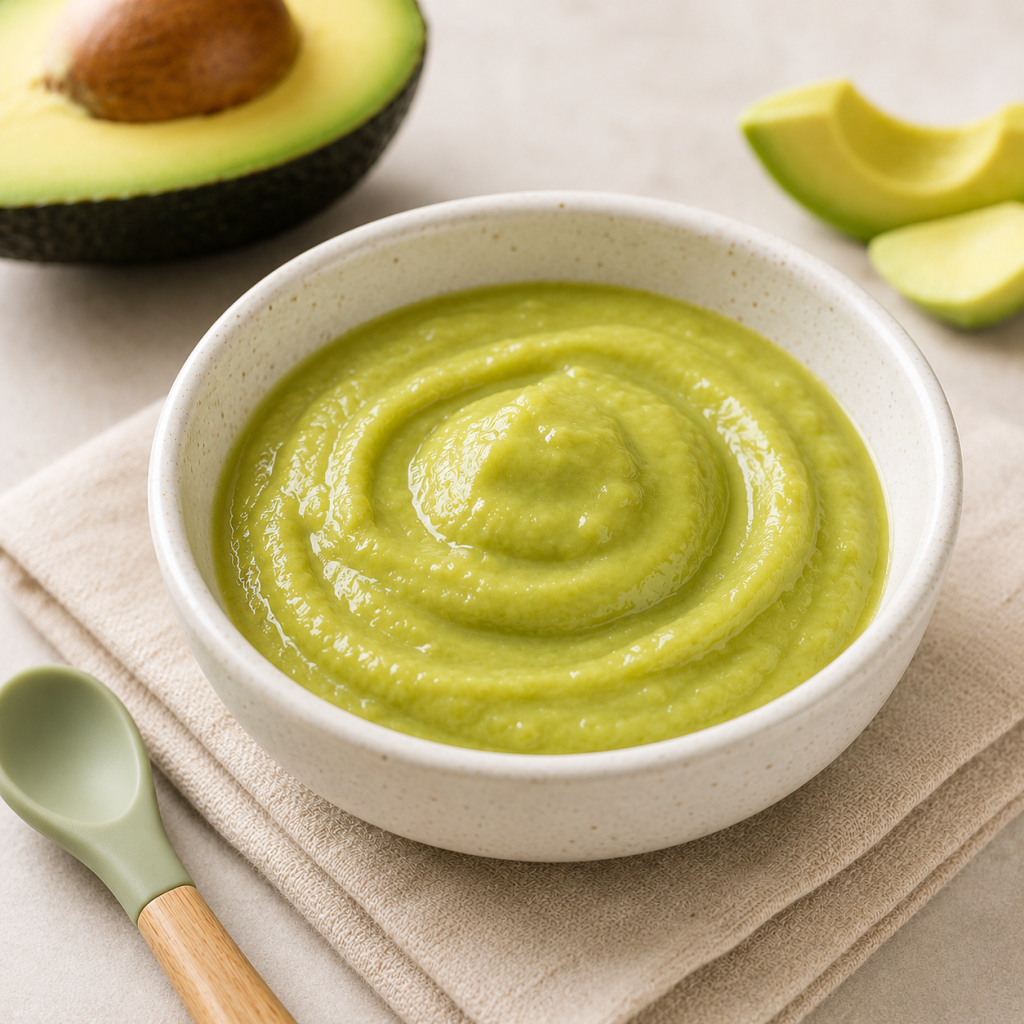
This easy avocado puree for baby is one of the simplest first foods you can prepare. It’s naturally creamy, requires no cooking and can be ready in just 5 minutes.
When I started preparing baby food at home, avocado was always one of my easiest options. There was no steaming or cooking involved – I could simply scoop, mash and serve.
You only need two simple ingredients for this avocado puree recipe for baby:
½ ripe avocado
1–3 tbsp warm water, as needed
Choose an avocado that is ripe and slightly soft when gently pressed. The softer it is, the easier it will be to create a smooth and creamy texture.
How to Make Avocado Puree for Baby
1. Prepare the Avocado
Wash and cut the avocado in half. Remove the seed and scoop the avocado flesh into a clean bowl.
2. Mash the Avocado
Use a fork or baby food masher to mash the avocado until smooth.
For babies who are just starting solids, you can also use a baby food blender or food processor to achieve a finer consistency.
3. Add Water
Add warm water one tablespoon at a time, mixing until you reach your baby’s preferred consistency.
For younger babies starting solids, you may prefer a thinner and smoother puree. As your baby gets used to different textures, you can gradually make it thicker.
4. Serve
Transfer the baby avocado puree into a clean baby bowl and serve immediately.
Avocado is best prepared fresh because it naturally starts to brown after being exposed to air.
Avocado was one of my favourite foods to prepare on busy days because there’s literally no cooking involved. Just scoop, mash and serve.
I normally make only enough for one meal rather than preparing a large batch because avocado is so quick to make and tastes best when freshly prepared.
How to Choose an Avocado for Baby Puree
Choosing a ripe avocado makes a big difference to the texture of your puree.
Look for an avocado that:
Feels slightly soft when gently pressed
Is easy to scoop from the skin
Has creamy flesh without excessive dark or damaged areas
Mashes easily with a fork
If the avocado is still firm, leave it at room temperature until it ripens before using it for your baby’s meal.
What Texture Should Avocado Puree Be?
The texture can be adjusted according to your baby’s stage and ability to manage solids.
For babies just starting solids: Blend or mash until very smooth and add a little water if necessary.
As baby progresses: Use less water and leave the avocado slightly thicker or gently mashed rather than completely smooth.
Always choose a texture appropriate for your baby’s developmental stage.
How to Store Avocado Puree
Unlike some cooked baby purees, I prefer preparing avocado immediately before serving.
Avocado naturally oxidises and begins turning brown after it is cut. If you have leftovers, place them in an airtight container and refrigerate promptly, but freshly prepared avocado generally gives you the best colour and texture.
What Can I Mix With Avocado?
Once your baby has already been introduced to the individual ingredients, avocado can be paired with many different foods.
Some easy combinations for future recipes include:
Avocado Banana Puree
Avocado Apple Puree
Avocado Sweet Potato Puree
Avocado Pumpkin Puree
Avocado Egg Mash
SHOP SY PICKS
These are the simple tools I use at home to make baby food prep quicker and easier. Nothing fancy, just a few practical essentials that make cooking, portioning and storing meals much more convenient.
Perfect for freezing baby food portions. Makes storing homemade purees simple, organised and convenient for everyday meals.
Frequently Asked Questions
Babies can generally start complementary foods at around 6 months, when they show signs of developmental readiness. If you’re unsure whether your baby is ready for solids, check with your healthcare professional.
No. Avocado does not need to be cooked. Simply choose a ripe avocado, scoop out the flesh and mash or blend it to an appropriate texture.
Avocado can be offered from around 6 months when your baby is developmentally ready for solid foods. Adjust the consistency according to your baby’s feeding abilities.
Not necessarily. A ripe avocado is naturally soft and creamy. You can add a small amount of warm water if you want a thinner consistency.
Avocado begins to oxidise after the flesh is exposed to air, causing it to gradually turn brown. This is one reason I prefer making avocado puree fresh for each meal.
Avocado can be frozen, but its colour and texture may change after thawing. Since avocado puree takes only a few minutes to prepare, I personally prefer making it fresh.
Yes. Once your baby has been introduced to the individual ingredients, avocado can be combined with foods such as banana, apple, pumpkin, sweet potato or egg.
This article shares my personal experience and general information and should not replace individual medical or feeding advice. Babies develop at different rates. Speak with your child’s healthcare professional before starting solids if you have concerns about developmental readiness, growth, allergies or feeding.
About the author
SY is a mum of one and the founder of PicksBySY. Like many mums, she’s constantly learning, discovering and figuring things out as her little one grows. She created PicksBySY to share her real parenting experiences, useful finds and everyday discoveries – from baby milestones and toddler life to family activities and products she genuinely uses and loves.
More Recipes
Explore more easy baby food recipes for your little one.
Looking for an easy pumpkin puree for baby? This simple homemade recipe is naturally sweet, creamy and perfect for babies starting solids.
Pumpkin was one of the easiest first foods for me to prepare because it becomes naturally soft and smooth after steaming. You only need pumpkin and a little water to create a creamy puree that’s easy for little ones to eat.
For a creamier texture, you can also use a little breast milk or prepared formula when serving.
How to Make Pumpkin Puree for Baby
1. Prepare the Pumpkin
Peel the pumpkin, remove the seeds and cut it into small cubes. Keeping the pieces roughly the same size helps them cook evenly.
2. Steam Until Soft
Steam the pumpkin for around 15–20 minutes, or until it is completely soft and can easily be mashed with a fork.
3. Blend the Pumpkin
Transfer the cooked pumpkin to a blender or food processor. Add a small amount of warm water and blend until smooth.
4. Adjust the Texture
For babies who are just starting solids, add a little more liquid to create a thinner and smoother consistency. As your baby becomes more comfortable with textures, you can gradually make the puree thicker.
5. Cool and Serve
Allow the baby pumpkin puree to cool to a safe temperature before serving.
I like making a little extra whenever I prepare pumpkin puree. Instead of cooking a tiny portion every time, I divide the extra puree into small portions and freeze them for another meal. It makes baby meal prep much easier on busy days.
What Can I Mix With Pumpkin Puree?
Once your baby has already tried the individual ingredients, pumpkin is an easy base to combine with other foods.
Some combinations to try include:
Pumpkin + Carrot
Pumpkin + Sweet Potato
Pumpkin + Apple
Pumpkin + Chicken
Pumpkin + Salmon
Pumpkin + Potato
You can gradually introduce different combinations as your baby becomes more familiar with solids.
How to Store Pumpkin Puree
Place leftover pumpkin puree in a clean, airtight container and refrigerate promptly. For longer storage, divide the puree into individual portions and freeze.
Always check the texture, smell and temperature before serving stored baby food.
SHOP SY PICKS
These are the simple tools I use at home to make baby food prep quicker and easier. Nothing fancy, just a few practical essentials that make cooking, portioning and storing meals much more convenient.
Perfect for freezing baby food portions. Makes storing homemade purees simple, organised and convenient for everyday meals.
Frequently Asked Questions
Pumpkin can be included as part of a varied diet when your baby is developmentally ready to start solid foods. Its naturally soft texture also makes it easy to puree.
Many babies begin complementary foods at around 6 months, when they show signs of developmental readiness. Follow your healthcare professional’s advice if you’re unsure whether your baby is ready.
Yes. Removing the skin and seeds before steaming makes it much easier to achieve a smooth puree.
Yes. Pumpkin puree can be portioned into freezer-safe containers or trays for convenient future meals.
Yes. Once your baby has been introduced to the individual ingredients, pumpkin and chicken can make a tasty savoury combination.
There’s usually no need to add salt or sugar to baby pumpkin puree. Pumpkin already has a naturally mild and slightly sweet flavour.
This article shares my personal experience and general information and should not replace individual medical or feeding advice. Babies develop at different rates. Speak with your child’s healthcare professional before starting solids if you have concerns about developmental readiness, growth, allergies or feeding.
About the author
SY is a mum of one and the founder of PicksBySY. Like many mums, she’s constantly learning, discovering and figuring things out as her little one grows. She created PicksBySY to share her real parenting experiences, useful finds and everyday discoveries – from baby milestones and toddler life to family activities and products she genuinely uses and loves.
More Recipes
Explore more easy baby food recipes for your little one.
Baby first foods were something I researched a lot before my little one reached the starting-solids stage.
I was excited for her to finally discover real food, but at the same time, I had so many questions.
What should I introduce first?
How much should she eat?
How quickly should I introduce another food?
And most importantly for me – how would I know which food caused a reaction if I introduced too many new ingredients at once?
When I started introducing baby first foods, I decided to keep things very simple.
Instead of introducing a completely different food every day, I preferred offering one new food for around three days before introducing another.
For me, this wasn’t about preventing food allergies. It was simply an approach that made me feel more comfortable because I could keep track of exactly what my baby had recently eaten.
If I noticed a possible reaction after introducing something new, there would be fewer new ingredients to consider.
So if you’re preparing to start solids too, here’s how I approached my baby’s first foods at 6 months, including a simple 7-day menu and what I learned along the way.
This is my personal experience rather than a feeding rule for every baby. Recommendations for introducing foods, particularly common allergens, can vary depending on your baby’s individual circumstances. Speak with your child’s healthcare professional if you have concerns about starting solids or food allergies.
Baby First Foods: Is Your Baby Ready to Start?
Before thinking about which baby first foods to prepare, I think there’s an even more important question:
Is your baby developmentally ready for solids?
Many babies begin complementary foods at around 6 months, but I didn’t want to look at age alone.
I also looked for signs of readiness such as:
Good head and neck control
Being able to sit with appropriate support
Showing interest when other people eat
Opening their mouth when food is offered
Bringing things towards their mouth
Being able to swallow food rather than automatically pushing everything back out
If you’re currently at this stage, I’ve also shared 10 Signs Baby Is Ready for Solid Foods (Don’t Start Too Early!).
Why I Introduced Baby First Foods One at a Time
When we first started solids, I didn’t immediately create complicated baby meals.
I kept our baby first foods very simple.
One new food at a time.
Then I offered the same food for around three days before introducing another new ingredient.
My thinking was simple.
If I introduced avocado on Monday, pumpkin on Tuesday and another completely new food on Wednesday, then noticed a possible reaction, I might be left wondering which new food was responsible.
Introducing foods individually made it easier for me to remember exactly what my baby had recently eaten.
It also gave her more than one opportunity to experience the same flavour and texture.
And I quickly learned that the first reaction to a food doesn’t necessarily tell you whether your baby will eventually enjoy it.
Sometimes the first spoonful was met with a facial expression that basically said:
“Mummy…what have you just put in my mouth?” 😂
And then she’d happily eat the same food another day.
My 7-Day Baby First Foods Menu
Here’s an example of how I approached the first seven days.
Day
Baby First Food
My Approach
Day 1
Avocado
First introduction
Day 2
Avocado
Offer again
Day 3
Avocado
Offer again
Day 4
Sweet Potato
First introduction
Day 5
Sweet Potato
Offer again
Day 6
Sweet Potato
Offer again
Day 7
Broccoli
Begin introducing the next food
This isn’t meant to be the exact menu every baby needs to follow.
You could choose other developmentally appropriate baby first foods.
The important part of my personal approach was simply:
Introduce → observe → offer again → then move on.
Days 1–3: Avocado as a Baby First Food
Avocado is one simple option when introducing baby first foods because it’s naturally soft and requires very little preparation.
I chose a ripe avocado and mashed it until it reached a texture suitable for my baby’s stage.
During these first few days, I wasn’t focused on how much she managed to eat.
I was paying attention to the whole experience.
How did she respond to the texture?
Was she comfortable after eating?
Did I notice anything unusual?
And…
Did any of the avocado actually stay inside her mouth? 😂
I learned very quickly that starting solids isn’t about finishing a bowl.
It’s about learning how to eat.
Days 4–6: Sweet Potato
After introducing the first food without concerns, I moved on to another simple ingredient.
Sweet potato is another easy option for baby first foods because it becomes very soft when steamed and is easy to mash.
I steamed it until completely soft and prepared it in a texture appropriate for my baby.
Again, I kept it simple.
No complicated recipes.
No need for five ingredients.
At this stage, sweet potato itself was already a completely new experience.
Mum Tip: Start With Small Portions
One thing I learned quickly was not to prepare huge portions.
When babies first start solids, they may eat very little.
I’d spend time preparing everything…
and she’d have a few tiny spoonfuls and decide she was done. 😂
Preparing smaller portions made much more sense for us.
Day 7: Introducing Another Baby First Food
By Day 7, I was ready to start introducing another new food.
For example, broccoli.
I would steam it until very soft and prepare it appropriately for my baby’s feeding abilities.
Then I could continue the same approach:
Day 7 – Broccoli
Day 8 – Broccoli
Day 9 – Broccoli
And then gradually introduce another food.
More Baby First Foods I Introduced
As my baby became more comfortable with solids, I gradually expanded the variety of foods she experienced.
Some baby first foods parents may consider, prepared appropriately for their baby’s developmental stage, include:
Avocado
Sweet potato
Broccoli
Pumpkin
Banana
Carrot
Pear
Apple
Oats
Egg
Fish
Chicken
Tofu
Iron-fortified infant cereal
I wouldn’t necessarily follow this exact order.
The appropriate foods and preparation can depend on your baby’s development, your family diet and individual feeding guidance.
I also wouldn’t unnecessarily delay common allergenic foods simply because I preferred introducing foods individually.
If you’re unsure about introducing foods such as egg, peanut, fish or other common allergens — particularly if your baby has severe eczema, an existing food allergy or other risk factors — speak with your child’s healthcare professional.
When I Started Combining Baby First Foods
Once my baby had already experienced several individual foods, meal preparation became much more interesting.
I gradually started combining familiar ingredients.
For example:
Avocado + banana
Pumpkin + porridge
Sweet potato + chicken
Broccoli + potato
Oats + fruit
Instead of introducing several completely unfamiliar ingredients in one meal, I could combine foods she’d previously experienced.
As her list of familiar foods grew, so did the number of meals I could prepare.
If your baby is already at this stage, I’ve also shared 5 Easy Baby Solid Food Recipes for Babies 6 Months+ for more meal inspiration.
What I Learned From Introducing Baby First Foods
The biggest lesson I learned was that starting solids didn’t need to be complicated.
Social media can make it look like a six-month-old needs a perfectly arranged plate containing five different foods at every meal.
That wasn’t how we started.
Sometimes the entire meal was simply:
Sweet potato.
And that was okay.
My baby was learning about food.
I was learning how to feed her.
And gradually, our meals naturally became more varied.
For me, introducing baby first foods was less about creating impressive meals and more about taking things gradually, observing my baby and helping her become comfortable with eating.
Frequently Asked Questions About Baby First Foods
What Are the Best Baby First Foods for 6 Months?
There isn’t one perfect first food for every baby.
Parents can introduce a variety of developmentally appropriate foods, including vegetables, fruits, iron-rich foods and protein sources.
Some simple baby first foods can include avocado, sweet potato, broccoli, pumpkin and iron-fortified infant cereal.
Do I Need to Wait Three Days Between Baby First Foods?
Not necessarily.
Offering the same food for around three days was the approach I personally preferred because it made it easier for me to keep track of what my baby had recently eaten.
It shouldn’t be interpreted as a rule that every parent must follow or as a way of preventing food allergies.
Why Introduce Baby First Foods One at a Time?
For me, introducing foods individually made tracking new ingredients easier.
If I noticed something unusual after introducing a new food, there were fewer recently introduced ingredients to consider.
It also gave my baby several opportunities to experience the same flavour and texture.
How Much Baby First Food Should a 6-Month-Old Eat?
Every baby’s appetite is different.
When we started solids, I focused less on making my baby finish a particular amount and more on giving her opportunities to experience food while watching her hunger and fullness cues.
If you have concerns about how much your baby eats or their growth, speak with your child’s healthcare professional.
Can I Mix Baby First Foods Together?
I personally started with individual foods.
Once my baby had already experienced several ingredients separately, I gradually began combining familiar foods into simple meals.
This gave us many more options as her feeding journey progressed.
What If My Baby Refuses Their First Foods?
I wouldn’t immediately assume your baby dislikes the food forever.
New tastes and textures can take time to become familiar.
If my baby wasn’t interested in something, I didn’t force her to finish it. I could simply offer it again another time.
Should My Baby Still Drink Milk After Starting First Foods?
Yes. Breast milk or infant formula continues to be an important part of a baby’s diet during the first year while complementary foods are gradually introduced.
Starting solids is a gradual transition rather than an immediate replacement of milk feeds.
Final Thoughts on Baby First Foods From One Mum to Another
When I first started researching baby first foods, I thought I needed a complicated meal plan.
I didn’t.
Keeping things simple actually made the experience much less overwhelming for me.
One food.
A few days.
Observe.
Then introduce another.
As my baby experienced more foods, our meals naturally became more varied.
Eventually, those simple mashed first foods turned into proper little meals.
And somewhere along the way, I went from wondering:
“What can she even eat?”
to:
“How did half of your dinner get onto the floor?” 😂
If you’re just beginning your baby’s first-food journey, don’t feel pressured to create perfect meals from Day 1.
Take your time, follow your baby’s developmental readiness and gradually introduce them to the huge new world of food.
It’s a learning experience for both baby and parent.
Written by SY A mum sharing personal parenting experiences, discoveries and everyday lessons.
This article shares my personal experience and general information and isn’t a substitute for individual medical or feeding advice. Speak with your child’s healthcare professional if you have concerns about starting solids, growth, feeding or food allergies.
Frequently Asked Questions About Baby First Foods
Once your baby is developmentally ready for solids, you can gradually introduce a variety of appropriately prepared foods. Examples include soft vegetables, fruits, iron-fortified infant cereal, well-cooked egg and other iron-rich and protein-rich foods. The appropriate preparation will depend on your baby’s developmental abilities and whether you’re spoon-feeding, using a baby-led approach or combining methods.
When first starting solids, babies may begin with small amounts of food and gradually progress to more regular meals. I personally found it easier to follow my baby’s appetite and slowly build a routine rather than worrying about immediately serving three meals every day. If you’re unsure about the amount or frequency that’s appropriate for your baby, discuss it with your child’s healthcare professional.
Breast milk or infant formula continues to be important during the first year. How you time milk and solid meals can depend on your baby’s age, routine and appetite. When starting solids, the goal isn’t to suddenly replace milk feeds with large solid meals.
here isn’t one perfect first food. Some simple options include avocado, sweet potato, pumpkin, broccoli, banana, well-cooked egg and iron-fortified infant cereal. I liked beginning with simple foods before gradually introducing more combinations.
Introducing foods individually can make it easier to observe how your baby responds, particularly when introducing common allergens.
However, parents don’t necessarily need to follow an overly restrictive diet or delay introducing variety without a medical reason.
Speak with your baby’s healthcare professional if you’re concerned about allergies.
Egg can generally be introduced once a baby is developmentally ready for solid foods, provided it is fully cooked and prepared appropriately.
Because egg is a common allergen, introduce it carefully and seek professional guidance if your baby has existing allergies, severe eczema or other allergy risk factors.
Small amounts of water can generally be introduced around the time babies begin eating complementary foods.
Breast milk or infant formula should still remain their primary milk drink during the first year.
Try not to panic.
Some babies need time to become comfortable with new tastes and textures.
From my experience, there were foods my baby seemed completely uninterested in initially but became more willing to eat later.
I try not to force her to finish food and instead offer different foods again on another day.
Some important considerations include avoiding honey before 12 months, limiting foods high in added salt or sugar, avoiding unpasteurised foods and preparing potential choking hazards safely.
Food-safety recommendations can vary by food and individual circumstances, so use reliable infant-feeding guidance or speak with your child’s healthcare professional if you’re unsure.
Final Thoughts From One Mum to Another
Starting solids can feel like another parenting topic where there are a million rules and opinions online.
Purees.
Baby-led weaning.
Meal schedules.
Food combinations.
Portion sizes.
It can become overwhelming very quickly.
What helped me was keeping the beginning simple.
One meal doesn’t need ten ingredients.
Your baby doesn’t need to finish everything you prepare.
And your baby’s first week of solids doesn’t need to look like someone’s perfectly arranged Instagram plate.
You’re introducing your little one to an entirely new world of food.
Let them explore.
Let them make a mess.
Take plenty of photos of those first-food faces. 😂
And gradually, one tiny bite at a time, eating becomes another skill they learn.
This article shares my personal experience and general information and should not replace individual medical or feeding advice. Babies develop at different rates. Speak with your child’s healthcare professional before starting solids if you have concerns about developmental readiness, growth, allergies or feeding.
About the author
SY is a mum of one and the founder of PicksBySY. Like many mums, she’s constantly learning, discovering and figuring things out as her little one grows. She created PicksBySY to share her real parenting experiences, useful finds and everyday discoveries – from baby milestones and toddler life to family activities and products she genuinely uses and loves.
Related Articles
Continue supporting your baby’s development with these helpful guides:
Toddler tantrums are something I knew would happen eventually. I had seen toddlers crying in shopping malls, refusing to leave playgrounds, lying on the floor and screaming over seemingly tiny things.
Then I became a mum to a toddler myself.
And suddenly, I understood.
Sometimes it starts because I said no. Sometimes she wants something but can’t quite tell me what she wants. Sometimes she’s tired, hungry or frustrated.
And sometimes?
I genuinely have no idea what happened. 😅
I’m still learning how to handle toddler tantrums, and I definitely don’t get it right every time. But experiencing these big emotions with my own child has changed the way I look at them.
Here are 10 things I’ve learned so far.
1. A Toddler Tantrum Isn’t Always About the Thing That Started It
One of the biggest things I’ve learned about toddler tantrums is that the trigger isn’t necessarily the whole problem.
The wrong snack might cause the crying.
But underneath that, my toddler might already be tired, hungry, overstimulated or frustrated.
I’ve learned to ask myself:
What happened before this?
Did she sleep enough?
Has she eaten?
Have we been outside for too long?
Has it been a particularly busy day?
Sometimes the “small thing” is simply the final straw.
2. Toddlers Have Big Feelings but Limited Words
This changed the way I see many of my toddler’s meltdowns.
As adults, we can say:
“I’m frustrated because you don’t understand what I’m trying to tell you.”
A young toddler often can’t.
They know what they want. They know something feels wrong. But they may not have the vocabulary to explain it.
So instead?
They cry.
They scream.
They point.
They throw themselves backwards.
It can be exhausting, but remembering that communication is still developing helps me approach these moments differently.
3. Staying Calm Is Harder Than Telling Someone to Stay Calm
Before becoming a parent, “just stay calm” sounded like perfectly reasonable advice.
Now?
I understand how difficult that can actually be. 😂
When your toddler has been crying for what feels like forever and you’re tired too, staying calm requires a surprising amount of self-control.
I’ve learned that raising my own voice rarely makes the situation easier.
Sometimes I need to deliberately slow down before responding.
Not because I’m always perfectly patient, but because when both of us are overwhelmed, nobody is helping anybody.
4. I Don’t Need to Stop Every Tantrum Immediately
At first, I felt like I needed to make the crying stop.
Quickly.
Especially in public.
Everyone can hear.
Everyone can see.
And suddenly you feel like the entire shopping mall is evaluating your parenting skills.
But I’ve slowly realised that my job isn’t necessarily to make every uncomfortable emotion disappear.
Sometimes my toddler is simply upset.
And she’s allowed to be upset.
If she’s safe, I can stay nearby, acknowledge what’s happening and give her a little time.
I don’t always need to immediately distract, bargain or give her what she wants just to stop the crying.
5. Acknowledging Her Feelings Doesn’t Mean Saying Yes
This has probably been one of my most useful lessons.
I can understand why my toddler is upset without changing the boundary.
For example:
“I know you want to keep playing. You’re upset because it’s time to go home.”
That doesn’t mean we stay at the playground for another hour.
Or:
“I know you want that. You’re disappointed because Mummy said no.”
The answer can still be no.
I’ve learned that acknowledging her feelings and maintaining a boundary can happen at the same time.
6. Giving Small Choices Can Prevent Some Battles
Toddlers seem to love having some control over their little world.
So instead of asking:
“Do you want to get dressed?”
when getting dressed isn’t actually optional, I’ve found it more helpful to offer a small choice:
“Do you want the pink shirt or the yellow shirt?”
Or:
“Do you want to walk to the bathroom or should Mummy carry you?”
She still needs to do the thing.
But she gets some control over how it happens.
It doesn’t prevent every toddler tantrum, of course, but sometimes a tiny choice makes transitions much easier.
7. Transitions Can Be Surprisingly Difficult
Leaving the playground.
Turning off the TV.
Getting out of the bath.
Putting toys away.
Going home.
I’ve noticed that suddenly ending something enjoyable can be difficult for toddlers.
So where possible, I try to give a little warning.
“Five more minutes, then we’re going home.”
Then:
“One more time down the slide.”
It’s not magic.
There can absolutely still be tears after the final slide. 😅
But giving some warning seems to make the change feel less sudden.
8. Hunger and Tiredness Change Everything
There are parenting techniques…
And then there is trying to reason with an exhausted toddler who skipped her nap. 😂
I’ve learned to manage my expectations.
If my toddler is hungry, tired or overstimulated, that probably isn’t the best time for a long lesson about behaviour.
Sometimes the most useful solution is incredibly basic:
Food.
Water.
Rest.
A quieter environment.
Or going home.
Understanding the physical reason behind a meltdown has helped me avoid turning every difficult moment into a discipline issue.
9. Public Tantrums Feel Worse Because I’m Thinking About Everyone Else
Toddler tantrums at home are one thing.
Toddler tantrums in the middle of a restaurant or shopping mall?
Completely different experience.
I become much more conscious of people looking.
But I’ve learned to remind myself that my priority is my child and the situation in front of me — not whether a stranger thinks I’m handling it perfectly.
If we need to step outside for a while, we do.
If she needs time to settle, I try to give her that.
Most parents have probably been there themselves.
10. I’m Learning Alongside My Toddler
Perhaps the biggest lesson I’ve learned from dealing with toddler tantrums is that emotional regulation isn’t something only toddlers are learning.
I’m learning too.
I’m learning patience.
I’m learning when to hold a boundary.
I’m learning when something isn’t worth turning into a battle.
I’m learning to recognise when my toddler has simply had enough.
And I’m learning that sometimes I’ll handle a situation really well…
while other times I’ll think later:
“Okay. I definitely could have handled that better.”
That’s parenting.
We learn, adjust and try again the next time.
What I Try to Do During a Toddler Tantrum
Every child and situation is different, but when my toddler is having a big meltdown, I generally try to keep things simple:
Make sure she’s safe.
Keep my own voice as calm as possible.
Use short, simple sentences.
Acknowledge what she’s feeling.
Avoid explaining too much while she’s extremely upset.
Hold the boundary when necessary.
Give her some time.
Reconnect once the big emotion has passed.
I’ve found that trying to teach or explain something in the middle of intense crying doesn’t always work.
Sometimes the conversation can wait until everyone is calmer.
What I’ve Stopped Expecting
I’ve stopped expecting myself to prevent every tantrum.
I’ve stopped expecting my toddler to behave like a tiny adult.
I’ve stopped believing every public meltdown means I’ve done something wrong.
And I’m trying to stop comparing how my child behaves with another child.
Toddlers are still learning how the world works.
And we’re still learning how to parent them.
When Toddler Tantrums Feel Like A Lot
Tantrums are common during toddlerhood, but parents should still trust their instincts if something about their child’s behaviour or development concerns them.
If tantrums are extremely intense, happen very frequently, involve your child regularly hurting themselves or others, or you’re concerned about their communication or development, consider discussing it with your child’s healthcare professional.
Sometimes having professional guidance can help you understand what’s happening and what support may be useful.
Frequently Asked Questions About Toddler Tantrums
At what age do toddler tantrums start?
Toddler tantrums often begin around 12–18 months, when children start to develop stronger opinions but still have limited language skills to express them.
How long do toddler tantrums usually last?
Most toddler tantrums last anywhere from a few minutes to around 20–30 minutes, depending on the child, the trigger, and how overwhelmed they are.
What is the best way to handle toddler tantrums?
There is no single “perfect” method, but many parents find it helpful to stay calm, acknowledge feelings, hold boundaries, and keep communication simple until the child settles.
Should I ignore a toddler tantrum?
It depends on the situation. It’s usually important to ignore the behaviour (like screaming or throwing) while still acknowledging the child’s feelings and ensuring they are safe.
Are toddler tantrums normal?
Yes — toddler tantrums are a normal part of emotional and brain development as children learn how to manage big feelings.
Final Thoughts From One Mum to Another
Toddler tantrums can be loud, exhausting, embarrassing and sometimes completely confusing.
But one thing I’m trying to remember is:
My toddler isn’t giving me a hard time. She’s having a hard time.
That doesn’t mean there shouldn’t be boundaries.
It doesn’t mean I say yes to everything.
And it definitely doesn’t mean I handle every tantrum perfectly.
It simply reminds me that behind all that crying is a little person who is still learning what emotions are and what to do with them.
And while she’s learning how to handle her big emotions, I’m learning how to be the mum she needs through them.
We’re both still figuring it out. 💛
Frequently Asked Questions
Yes, toddler tantrums are common during the toddler years. Young children are still learning how to communicate what they want and manage big emotions such as frustration, anger and disappointment. As a mum, understanding this has helped me see tantrums less as “bad behaviour” and more as moments when my toddler is struggling to express or manage how she feels.
Toddler tantrums can start from around 12 to 18 months, although every child develops differently. As toddlers become more independent, they often know exactly what they want but may not yet have the words or emotional skills to express it.
There can be many triggers for toddler tantrums. From my experience, tiredness, hunger, frustration, overstimulation, transitions and being told “no” can all play a part. Sometimes I’ve also learned that the thing that starts the tantrum isn’t necessarily the real reason behind it. A small frustration can simply be the final straw after a long or tiring day.
There isn’t one approach that works for every toddler. What I try to do is stay as calm as possible, keep my words simple, acknowledge my toddler’s feelings and maintain necessary boundaries. When she’s extremely upset, I’ve found that giving long explanations usually doesn’t help. I prefer to wait until the big emotion has passed before trying to explain more.
Personally, I don’t completely ignore my toddler during a tantrum. I make sure she’s safe and let her know that I’m nearby.
Sometimes she wants comfort, while other times she needs a little space. I’m learning to respond to what she needs in that moment rather than expecting the same approach to work every time.
I’ve learned that acknowledging my toddler’s feelings doesn’t mean I have to change a boundary.
If I’ve said no for a reason, I can still acknowledge her disappointment while keeping my answer the same.
For example:
“I know you really want it. You’re upset because Mummy said no.”
She may still be unhappy, but I’m slowly learning that it’s okay for her to experience disappointment while I stay consistent.
I don’t think every tantrum can be prevented, but I’ve noticed that a few things can sometimes help.
Making sure my toddler isn’t overly hungry or tired, giving warnings before transitions, offering small choices and avoiding overly stimulating situations when she’s already exhausted can make certain moments easier.
Of course, tantrums can still happen – because toddlers are toddlers. 😅
Every toddler and every tantrum is different. Some meltdowns may pass within a few minutes, while others can take longer, especially when a child is very tired, frustrated or overwhelmed.
Instead of focusing too much on how quickly I can stop the tantrum, I try to focus on keeping my toddler safe and helping her through the moment.
Limited communication can sometimes contribute to toddler tantrums. A toddler may know exactly what they want but not yet have the words to explain it.
This is one reason I’ve found it helpful to encourage simple words, gestures and other ways for my toddler to communicate what she needs.
Tantrums are common during toddlerhood, but if you’re concerned about your child’s behaviour, communication or development, it’s worth discussing those concerns with a qualified healthcare professional.
You may also want professional guidance if tantrums are extremely intense, regularly involve your child hurting themselves or others, or significantly interfere with everyday life.
Every child is different, so professional advice can help you better understand what’s happening in your child’s individual situation.
This article shares my personal parenting experience and is for general informational purposes. Every child develops differently. If you have concerns about your child’s behaviour, emotional development or wellbeing, speak with a qualified healthcare professional.
About the author
SY is a mum of one and the founder of PicksBySY. Like many mums, she’s constantly learning, discovering and figuring things out as her little one grows. She created PicksBySY to share her real parenting experiences, useful finds and everyday discoveries – from baby milestones and toddler life to family activities and products she genuinely uses and loves.
Related Articles
Continue supporting your baby’s development with these helpful guides: